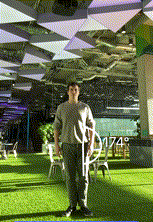
Hip Range Of Motion
Capture the Range of Motion Reading for the user's hip
Feature
- Swift
- Kotlin
- React Native
feature = .rangeOfMotion(.hip(side: .left, clockwiseDirection: false))
feature = .rangeOfMotion(.hip(side: .left, clockwiseDirection: true))
feature = .rangeOfMotion(.hip(side: .right, clockwiseDirection: false))
feature = .rangeOfMotion(.hip(side: .right, clockwiseDirection: true))
feature = .rangeOfMotion(.hip(side: .left, clockwiseDirection: false), style: customOrConditionalStyle)
feature = Feature.RangeOfMotion(RangeOfMotion.Hip(Side.LEFT, false))
feature = Feature.RangeOfMotion(RangeOfMotion.Hip(Side.LEFT, true))
feature = Feature.RangeOfMotion(RangeOfMotion.Hip(Side.RIGHT, false))
feature = Feature.RangeOfMotion(RangeOfMotion.Hip(Side.RIGHT, true))
feature = Feature.RangeOfMotion(RangeOfMotion.Hip(Side.LEFT, false), style = customOrConditionalStyle)
feature = 'rangeOfMotion.hip.left'
feature = 'rangeOfMotion.hip.left.clockwise'
feature = 'rangeOfMotion.hip.right'
feature = 'rangeOfMotion.hip.right.clockwise'
featureStyles = { 'rangeOfMotion.hip.left': { conditionalColors: [{ min: 0.8, max: null, color: '#00FF00' }] } }
Side & Clockwise
This feature requires a side parameter, enter the user's side, not the side from the camera's perspective. This enables easier prompts to the user, and multiple camera support.
After correctly determining which side to request, the direction must also be specified. Is it clockwise or anti-clockwise? Typically the direction of measurement can shift depending on the side, so these two paramters are interconnected.
For example
feature = .rangeOfMotion(.hip(side: .left, clockwiseDirection: true))
Will render on the user's left side, and in the clockwise direction.
Basic Implementation
No changes are needed to the view from the basic setup described in the Getting Started Guide:
- Swift
- Kotlin
ZStack(alignment: .top) {
    QuickPoseCameraView(useFrontCamera: true, delegate: quickPose)
    QuickPoseOverlayView(overlayImage: $overlayImage)
}
AndroidView(
    factory = { ctx ->
        QuickPoseCameraSwitchView(ctx, quickPose).also { view ->
            lifecycleScope.launch { view.start(useFrontCamera = true) }
        }
    },
    modifier = Modifier.fillMaxSize()
)
Conditional Styling
To give user feedback consider using conditional styling so that when the user's measurement goes above a threshold, here 0.8, a green highlight is shown.
- Swift
- Kotlin
- React Native
let greenHighlightStyle = QuickPose.Style(conditionalColors: [QuickPose.Style.ConditionalColor(min: 0.8, max: nil, color: UIColor.green)])
quickPose.start(features: [.rangeOfMotion(.hip(side: .left, clockwiseDirection: false), style: customOrConditionalStyle)],
                onFrame: { status, image, features, feedback, landmarks in  ...
})
val greenHighlightStyle = Style(conditionalColors = listOf(Style.ConditionalColor(min = 0.8f, max = null, color = Color.valueOf(Color.GREEN))))
quickPose.start(arrayOf(Feature.RangeOfMotion(RangeOfMotion.Hip(Side.LEFT, false), style = customOrConditionalStyle)),
    onFrame = { status, overlay, features, feedback, landmarks -> ...
})
<QuickPoseView
  sdkKey="YOUR_SDK_KEY"
  features={['rangeOfMotion.hip.left']}
  featureStyles={{
    'rangeOfMotion.hip.left': {
      conditionalColors: [
        { min: 0.8, max: null, color: '#00FF00' },
      ],
    },
  }}
  useFrontCamera={true}
  style={{ flex: 1 }}
  onUpdate={(event) => { ... }}
/>
Improving the Captured Results
The basic implementation above would likely capture an incorrect value, as in the real world users need time to understand what they are doing, change their mind, or QuickPose can simply get an incorrect value due to poor lighting or the user's stance. These issues are partially mitigated by on-screen feedback, but it's best to use an QuickPoseDoubleUnchangedDetector to keep reading the values until the user has settled on a final answer.
Declare a configurable Unchanged detector, which can be used to turn many of our input features into more reliable readings.
- Swift
- Kotlin
@State private var unchanged = QuickPoseDoubleUnchangedDetector(similarDuration: 2)
private val unchanged = QuickPoseDoubleUnchangedDetector(similarDuration = 2000L) // 2000 ms
This will trigger the callback block when the result has stayed the same for 2 seconds. The above uses the default leniency, but this can be modified in the constructor.
- Swift
- Kotlin
@State private var unchanged = QuickPoseDoubleUnchangedDetector(similarDuration: 2, leniency: 0.2) // 20% leniency
private val unchanged = QuickPoseDoubleUnchangedDetector(similarDuration = 2000L, leniency = 0.2) // 20% leniency
The unchanged detector is added to your onFrame callback, and is updated every time a result is found, triggering its onChange callback only when the result has not changed for the specified duration.
- Swift
- Kotlin
quickPose.start(features: [.rangeOfMotion(.hip(side: .left, clockwiseDirection: false))], onFrame: { status, image, features, feedback, landmarks in
    switch status {
        case .success:
            overlayImage = image
            if let result = features.values.first  {
                feedbackText = result.stringValue
                unchanged.count(result: result.value) {
                    print("Final Result \(result.value)")
                    // your code to save result
                }
            } else {
                feedbackText = nil // blank if no person detected
            }
        case .noPersonFound:
            feedbackText = "Stand in view";
        case .sdkValidationError:
            feedbackText = "Be back soon";
    }
})
quickPose.start(
    arrayOf(Feature.RangeOfMotion(RangeOfMotion.Hip(Side.LEFT, false))),
    onFrame = { status, overlay, features, feedback, landmarks ->
        when (status) {
            is Status.Success -> {
                overlayImage = overlay
                val result = features.values.firstOrNull()
                if (result != null) {
                    feedbackText = result.stringValue
                    unchanged.count(result = result.value.toDouble()) {
                        println("Final Result ${result.value}")
                        // your code to save result
                    }
                } else {
                    feedbackText = null // blank if no person detected
                }
            }
            is Status.NoPersonFound -> feedbackText = "Stand in view"
            is Status.SdkValidationError -> feedbackText = "Be back soon"
        }
    }
)
Improving Guidance
Despite the improvements above, the user doesn't have clear instructions to know what to do, this can be fixed by adding user guidance.
Our recommended pattern is to use an enum to capture all the states in your application.
enum ViewState: Equatable {
        case intro
        case measuring(score: Double)
        case completed(score: Double)
        case error(_ prompt: String)

        var prompt: String? {
            switch self {
            case .intro:
                return "Raise your left leg to the side\nas high as you can"
            case .measuring(let score):
                return nil
            case .completed(let score):
                return "Thank you\nReading: \(String(format:"%.0f°",score))"
            case .error(let prompt):
                return prompt
            }
        }
        var features: [QuickPose.Feature]{
            switch self {
            case .intro, .measuring:
                return [.rangeOfMotion(.hip(side: .left, clockwiseDirection: false))]
            case .completed, .error:
                return []
            }
        }
    }
Alongside the states we also provide a prompt text, which instructs the user at each step, and similarly the features property instructs which features to pass to QuickPose, note for the completed state QuickPose doesn't process any features.
Declare this so your SwiftUI views can access it, starting in the .intro state, our exmaple is simplifited to just demonstrate the pattern, as you would typically start with more positioning guidance.
@State private var state: ViewState = .intro
Next make some modifications, so that your feedbackText is pulled from the state prompt by default
.overlay(alignment: .center) {
    if let feedbackText = state.prompt {
        Text(feedbackText)
            .font(.system(size: 26, weight: .semibold)).foregroundColor(.white).multilineTextAlignment(.center)
            .padding(16)
            .background(RoundedRectangle(cornerRadius: 8).foregroundColor(Color("AccentColor").opacity(0.8)))
            .padding(.bottom, 40)
    }
}
This now means you can remove the feedbackText declaration:
//@State private var feedbackText: String? = nil // remove the feedbackText
There's two changes we need to make, first we need to update quickpose with the features for each state:
.onChange(of: state) { _ in
    quickPose.update(features: state.features)
}
Then we should start quickpose from the state's features as well.
.onAppear {
    quickPose.start(features: state.features, onFrame: { status, image, features, feedback, landmarks in
    ...
And in the onFrame callback update the state instead of the feedbackText. This allows the UI input to change the view state in a controlled manner, so that for example the .intro state can only be accessed if the user's hand is missing from the .measuring state, or from the .error state.
quickPose.start(features: state.features, onFrame: { status, image, features, feedback, landmarks in
    switch status {
        case .success:
            overlayImage = image
            if let result = features.values.first {
                state = .measuring(score: result.value)
                unchanged.count(result: result.value) {
                    state = .completed(score: result.value)
                    // your code to save result
                }
            } else if case .measuring = state {
                state = .intro
            } else if case .error = state {
                state = .intro
            }
        case .noPersonFound:
            state = .error("Stand in view")
        case .sdkValidationError:
            state = .error("Be back soon")
    }
})